The following instructions should provide you with the ability to create a 3-D object that appears to grow along a defined path, over a specified period of time.
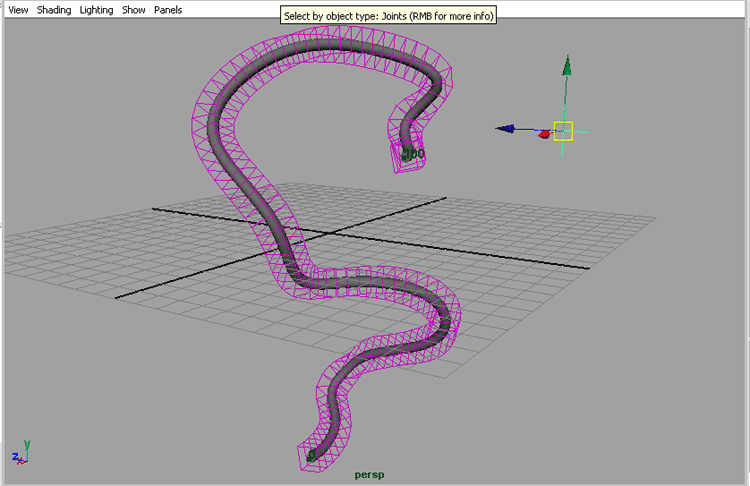
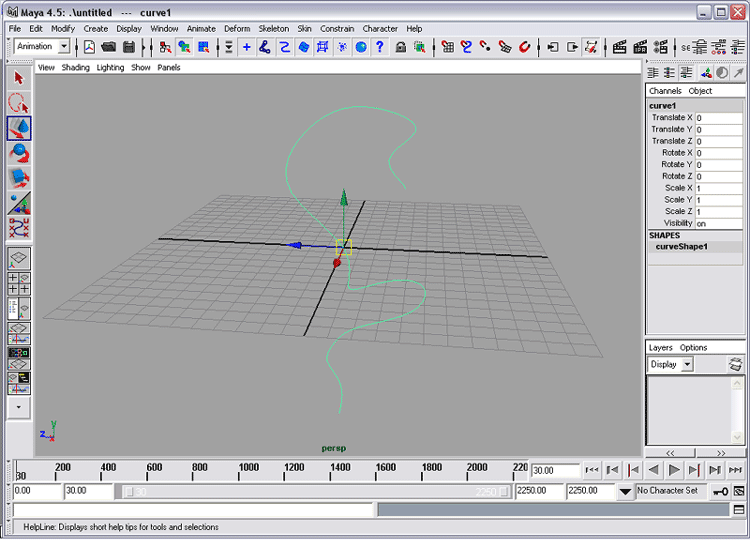
With Maya open, use whatever method you prefer to draw a curve. Start drawing your curve from the point where you want the object to begin growing. (This can be reversed later if necessary.) Also keep in mind that the more complex your curve is, i.e. the more sharp turns and twists it has, the greater the risk is that your object will deform in unpredictable ways as it is held to the path.
Once you have your curve, import or create the object you would like to grow along it. For the purpose of this tutorial, I have created a polygon cylinder from the Polygon Primitives menu. Because the default settings for the cylinder do not provide me with enough subdivisions along its height to create a smooth deformation, I have gone into the Channel Menu, selected the shape node under the Inputs section, and changed the height subdivisions from 1 to 200. How many divisions you will need on a given object will depend on the length and complexity of your curve. I have also scaled the cylinder down to create a narrower appearance. If the object you are deforming is too thick, it may intersect itself as it follows the curve.
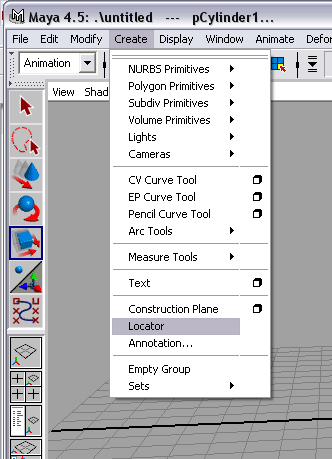
Before attaching the object to the curve you should also create a locator. If you have other locators in your scene already, pay attention to the name of the newly created one.
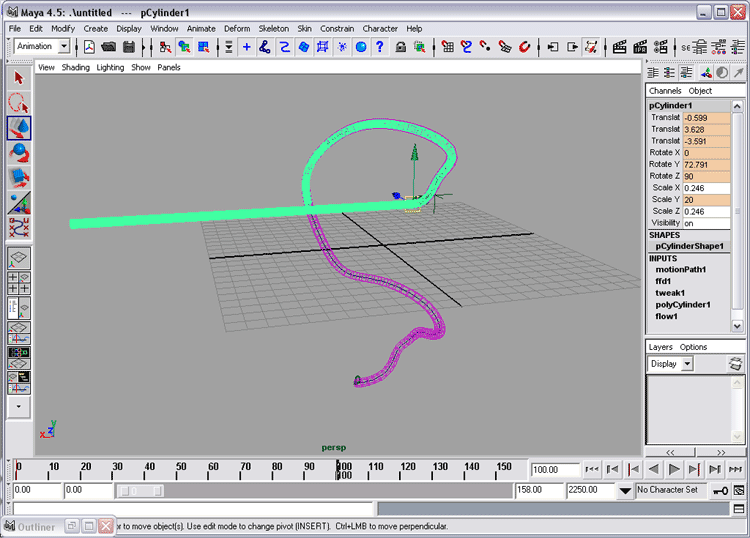
Next, select the object, and Shift+select the curve. Make sure you are in the Animation submenu, and pull down Animate > Motion Paths > Attach to Motion Path and choose the options box icon. The box should look something like this:
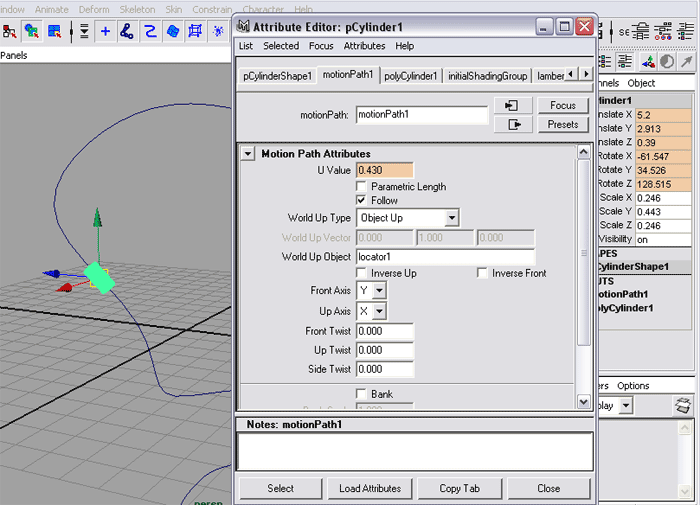
Choosing a specific Start/End for the path allows you to start determining the time span in which you would like to grow your object. Choosing the Time Slider option also works, but generally you have a larger time span on the slider than you might want for the deformation. Make sure you have the Follow box checked and Object Up selected in the pull-down menu. Your Front and Up axis will vary with the design of your object, so either choose the correct axis, or make a guess and modify it later if necessary. I usually do the latter. Also make sure that you have the name of the locator you created in the entry line for the World Up Object. Finally, choose Attach.
Drag through your timeline and watch how your object follows the curve. Mine did not travel the curve facing the right direction, so I opened the Attribute Editor, selected the object and chose the motionPath1 tab at the top of the window. From there I could easily change the Front and Up axis until the object was oriented correctly.
The next step is to add a lattice to the curve that will deform the object smoothly as it grows. Select the object and return to the Animate > Motion Path menu. This time choose the Flow Path Object options box.
Your option box should look something like this:
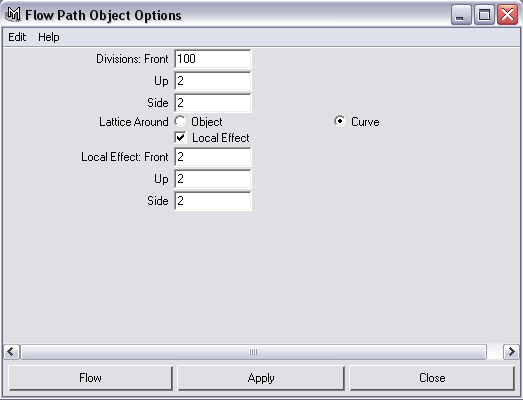
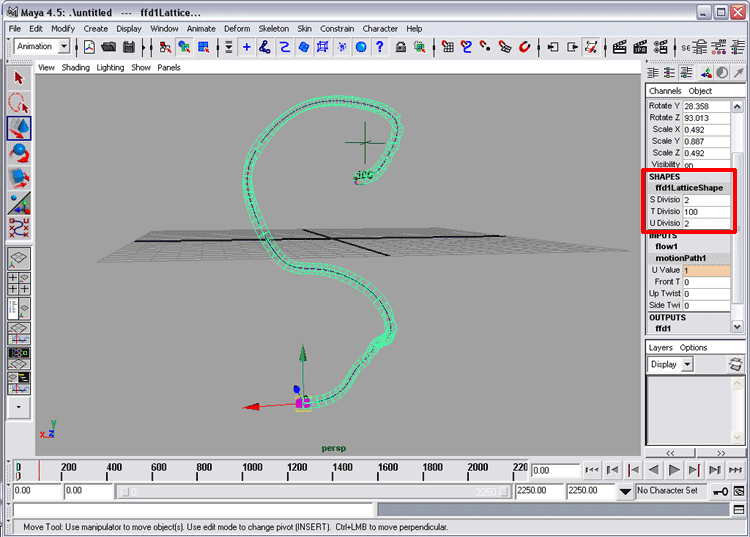
In the Divisions: Front entry line, type in a fairly large number. I've chosen 100. This determines the number of divisions in the lattice that will follow the curve. The more complex the curve, the more divisions you will want to use. Leave the other numbers for now, but make sure Curve and Local Effect are both selected. Click Flow.
If you need to add or subtract divisions from the lattice, it can be done in the area of the Channel menu outlined in red (above).
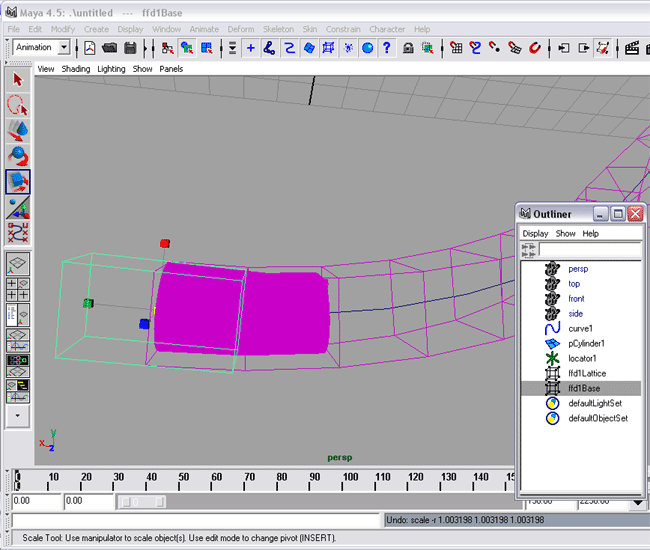
When you drag through your timeline, the object may already appear to be affected by the new lattice, depending on it's size and shape. You may also notice that the lattice is deforming it in other less attractive ways. This is probably due to the lattice being too small for the object. If this is the case, or you want to be on the safe side later, open up the Outliner and look for the Base that corresponds to the new lattice.
Select the base and use the Scale tool to enlarge it. You should see the rest of the lattice enlarge with it. Just scale the base up until your object has a little breathing room within the lattice.
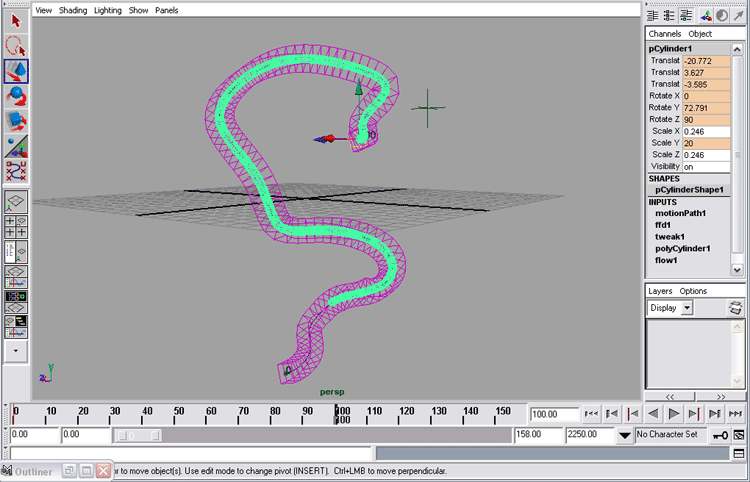
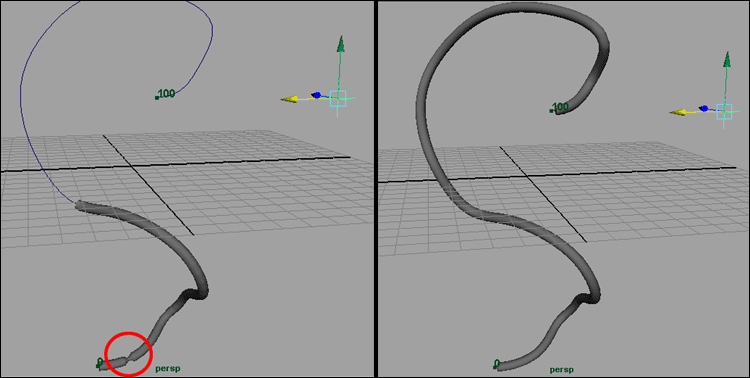
The next step is to make the object 'grow.' Select your object and then highlight the Scale axis in the Channel menu along which you would like it to grow. This will be the same axis that you set as the Front axis in your Motion Path settings. In my case, it was the Y axis. Drag your time slider to 0 (or the Start position for your path) and set the Scale you highlighted to 0, then set a key frame for it. Drag your slider to the frame that corresponds to the End of your path, enlarge the scale a bit (I went up to 20) and set another key frame for the scale. After doing this, my cylinder looked like this:
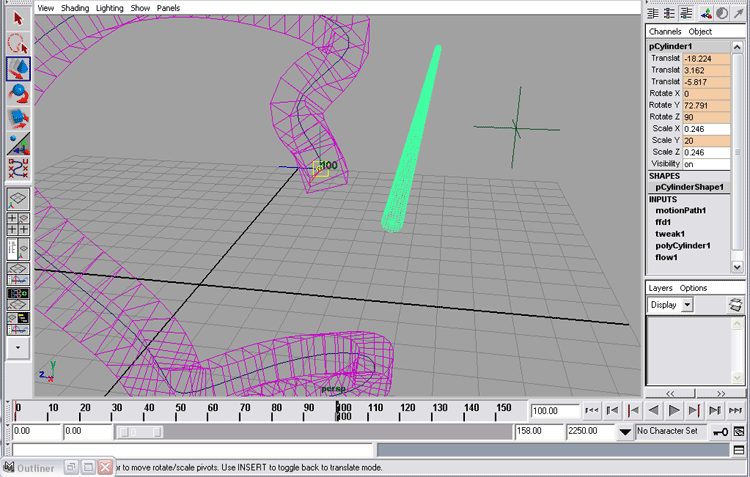
It's a start, but obviously some things still need to be fixed. With your object still selected, and the Translate tool active, hit Insert. Click on the pivot point and try to drag it. Instead of the pivot moving like you would normally expect to see, the object itself should start to move. The picture below shows the pivot moved away from the object, and how the object has moved completely outside of the lattice.
Your goal is the relocate the pivot to the center of the end of your object that is closest to the End of your path. It might take some careful adjustment but you should be able to get very close to this point. It isn't vital that it be exactly on the edge of the object or perfectly centered, but the closer, the better. Once you have the pivot relocated, the results should be obvious. With your time slider still located at the End frame of your path, the object should now be entirely contained within the lattice.
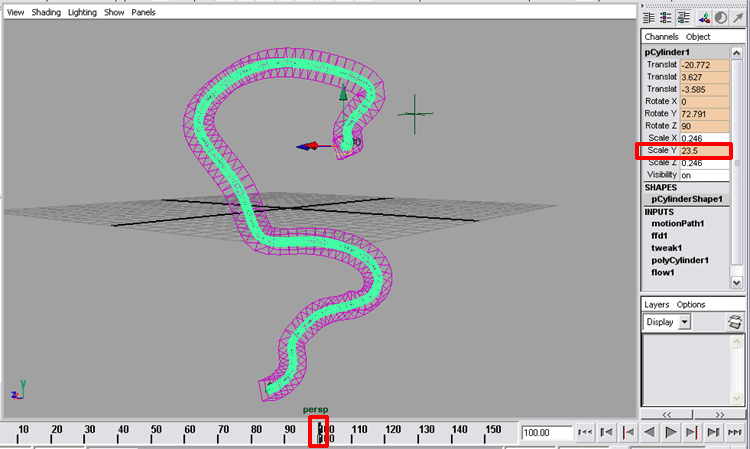
As you can see from my example, the object may not extend all the way to the end of the lattice. Ideally we want it to reach from one end of the lattice to the other when it is fully extended, so now is the time to adjust the scale you keyed earlier until it fills the lattice correctly. To do this, I start typing in larger and larger numbers in the keyed scale's box in the Channel menu. If the object starts to extend outside the lattice, I back up and do some finer adjustments
The number I finally settled on was 23.5, and you can see the position of the time slider as well as the scale box outlined in red above. Re-key your scale with the new value, but make sure the time slider position remains the same.
Drag through the time line and watch to see how the object grows. Occasionally you may run into issues with the object poking out of the lattice at the top or bottom at strange intervals. This usually only happens with very complex curves. If it does, reduce the final scale number until it ceases to pop out of the lattice. You might also want to double-check and make sure that the pivot point is as close to the end of your object as possible, but doesn't rest outside of it.
As you drag through the timeline, you may notice that the object twists oddly. It may be a twist that stays in one place through the whole animation, or it may come and go in different locations along the curve. This is why you created the locator. Select the locator, make sure the Translate tool is active, and drag it around the curve. I suggest doing this with the object fully extended at first. You should see the lattice move in response to the locator's position, which should also affect the object inside. Try to find a position where the lattice and object have no twist-offs or kinks. If you can't get rid of all of them, do the best you can; then try selecting the curve, going into Component mode, and moving the CVs in the area that still has a kink. Sometimes a few small adjustments there can help to ease or eliminate the problem.
Now drag through the time line again. Your object may be perfect at the end of it's animation, but it might have kinks that come and go during the animation. My sample object did this, and the curve wasn't even terribly complicated:
There are several ways to deal with these unwanted twists. One, if you can hide that part of the curve during the final overall animation, it might work fine like it is. If you have to see all of the object as it grows, another option is to animate the position of the locator. This generally involves a large amount of trial and error, but by having the locator change position as the object grows, you may be able to eliminate all, or almost all, of the offending kinks. As a last ditch effort, you can also animate the actual vertices on the object itself (or, sometimes, the curve if some small movement can be allowed or happens to be desired) to correct the kinking, but if your object is detailed, this can be very time-consuming.
Another final touch to the animation might be adding movement to the CVs that make up the curve as the object is growing and following it. Depending on the context of the growing object, this may or may not be an option. Doing this also has a tendency to create new problems with the object moving back and forth within the lattice (the popping out discussed earlier), but it does add another layer to the object's animation. If you do choose to animate the curve, you may have to readjust the scaling key frames as well as look into animating the locator, if you haven't already done so.
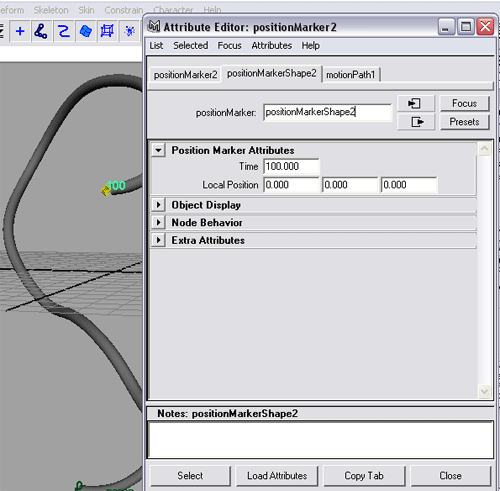
You should now have an object that grows over a specified time frame, but what if you decide you want to change the start and end frames that define it? To do this you need to select the position markers at the ends of the curve. Once you have selected one of them, open up the Attribute Editor and select the positionmarkerShape node. In the Time dialog box you can set the frame number to whatever you'd like the new position to be.
Another thing you can do while the position marker is selected is drag it along the curve to reposition it. For this type of growing animation, doing so doesn't usually serve much of a purpose, but the option is there should you come up with a use for it.
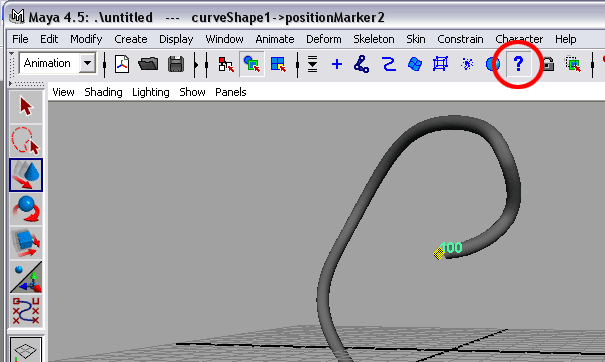
If you have any trouble selecting only the position markers in order to change their frame numbers, try using the Selection Mask buttons. By default they are all active. Deactivate all but the last 'Miscellaneous' button (outlined below in red). If you right-click on the buttons you can see what each one controls. This should let you easily select the position markers without picking up the curve, lattice, or object.
Following these instructions should give you a good start on making your object grow. Other adjustments are possible, and it never hurts to experiment--just make sure you save your file (I usually save a new version each time I start a new segment of a project, and then some) before doing anything too drastic. When you start to build complex animations, simply using the undo button will not always revert you back to the original state. The more you add to an animation, the more you increase the risk for unpredictable results. Good luck with the 'growing'! ;-) ----Christina Johnson 2003